
How to make a belly mask
 We've talked about henna art as a way to celebrate one's beautiful body in pregnancy, and today we're talking about how to make a belly mask or belly cast. A belly mask is a beautiful way to capture the shape of your body in the weeks before birth (and you can certainly make one sooner if you wish!). You may wish to have this be part of a blessingway or baby shower, or it may be a private creation you share with a good friend, relative or partner. (It's helpful to have someone to help you!)
Making a belly mask is easy to do and inexpensive. It can get a bit messy; however, so you might consider creating this work of art outside or indoors with proper covering on the floor.
Here's what you need:
- 3 rolls of plaster gauze (available at a local craft store; also used for making face masks)
- small jar of vaseline
- an old bucket
- warm water
- a few rags
- drop cloth or old shower curtain liner (if doing inside)
- soft measuring tape
Here is how you do it!
- Gather all of your supplies and fill your bucket with warm water.
- Remove your clothes from the waist up (you can keep a tank top or bra on if you are doing this in a group setting and prefer this). You may also want to take off your pants, wear a bikini bottom, or wear old pants you don't mind getting messy.
- Stand on the drop cloth or shower curtain if creating your belly mask inside. If you are outside or in a garage, you can use a hose to wash away the drips of plaster.
- Measure horizontally across the areas you want to cover, including your belly and possibly your breasts. (Some people make a bowl out of just the cast of their belly, while others like to have their breasts included in the mask as well!) Cut the strips of gauze to match the varying lengths. You will want to cut enough strips for each location to make your cast 2 to 3 layers thick.
- Once you have measured out the gauze, rub your belly and torso with a thin layer of vaseline. This will prevent the gauze from sticking to you and/or tugging on your skin as you remove your completed belly cast later. (FYI: you don't need to rub vaseline on your pubic hair, the gauze doesn't stick well to hair.
- Follow the directions on the gauze package, dipping the strips into the warm water and then applying them to your belly. You can begin anywhere you like. The idea is to make overlapping horizontal layers leaving no spaces uncovered. Continue adding gauze until you have your desired shape.
- Allow the cast to dry for about 5 minutes and remove from your body.
- At this point, you can smooth out the edges by folding them back.
- Place in a dry protected place to complete the drying process. It takes about 24 hours for the belly mask to dry completely.
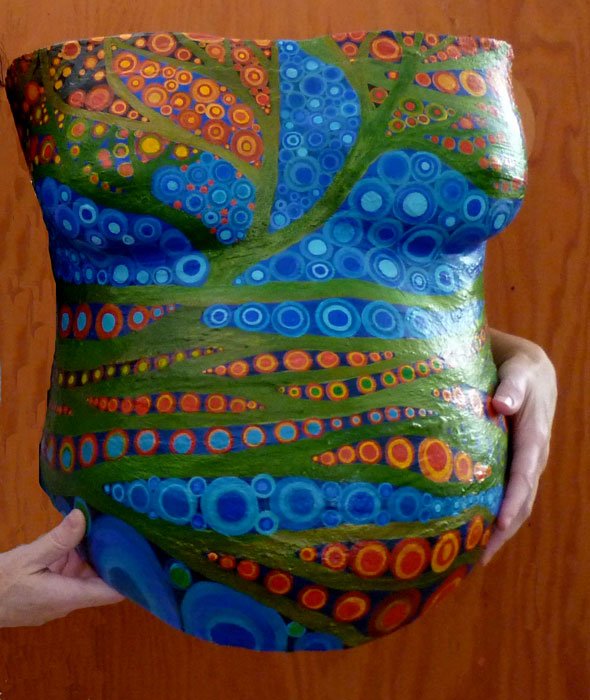
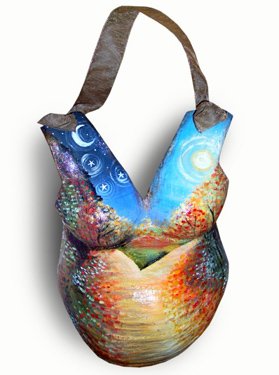
- Once the belly cast is dry, you can leave it as is, or paint it with acrylic paints. You may want to have someone spray it with lacquer or glaze for extra protection. If you must spray it yourself, please do so in a well ventilated area.
This website has some beautiful artistic inspiration and surely you could find ideas on Pinterest. Have fun!